Window shades like blinds are an essential part of your home, not only for decorative purposes but also to give you privacy, control how much light you let into your home, and providing insulating your windows.
One type of window blind that is becoming popular in the UK is Day & Night blinds, these versatile and practical blinds offer a unique combination of light control and privacy features, using modern fabric techniques, making them great shading choice for almost any room in your home (except the bathroom). Today, we will cover everything you could possibly want to know about Day & Night blinds, including: what they are, what sets them apart from other blinds, how to measure for them, and how to install them in your home.
What are Day & Night Blinds?
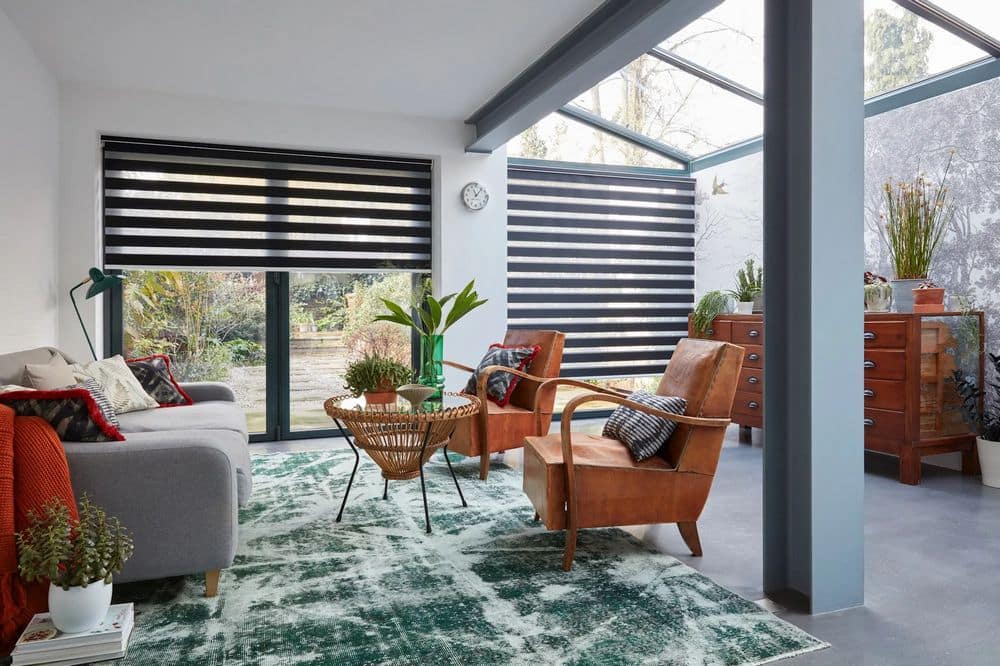
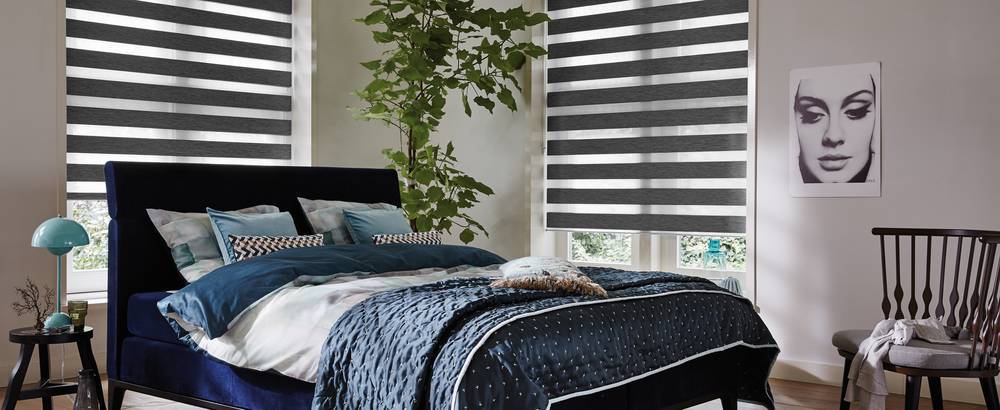
Day & Night blinds (sometimes also called zebra blinds or vision blinds) are an innovative and type of window covering that uses a complex shading fabric which combines two layers of fabric to create a distinctive striped pattern. The first layer is made of a thin and transparent material much like a net curtain, while the second layer is made of a solid fabric which will block out light. When using the blinds you can adjust the position of the layers to create a range of light control and privacy options, depending on your needs and the time of day. Alternatively, this blind can be totally rolled up, like a roller blind, keeping it tucked out of the way until you need it.
What makes Day & Night Blinds so special?
One of the main benefits of Day & Night blinds is their versatility, they allow you to adjust the blinds to let in as much or as little outside light as you like, while still securing your privacy from passers-by. No other blind gives you such complete control over the levels of light in your home. Having this level of control can be compared to that of a venetian blind, however these Day & Night blinds are lighter and made solely of fabric. This makes them an excellent choice for any room in your home, from the living room to the bedroom.
This stylish option is taking the industry by storm simply because it as a modern and diverse means of shading a room which provides you with plenty of options for blocking light from entering your room.
Another advantage is that they can be an independent window decoration. In modern interiors, they perfectly decorate and darken the room without using any other window accessories. Day & Night blinds are an alternative to curtains – they are just as aesthetic, and at the same time much more functional. Patterns and colours of roller blinds are an endless palette of colours and their shades. It will not be difficult to match the blinds to the overall design of the room. You can use them to create an element that breaks the uniform colour of the walls or a decoration consistent with colours.
How do you measure for Day & Night Blinds?
Before buying your new set of Day & Night blinds, you need to accurately measure your windows to make sure the blind is made to the perfect size. To measure for a Day & Night blind to fit inside the recess of your standard window, simply measure the full width and the height of the recess.
Here are the steps you should follow:
- Measure the width of your window frame from one side to the other, noting down your measurement.
- Measure the drop, which is the height of your window from the top of the frame to the bottom. Again, note down the measurement.
- Measure the depth of your window frame, from the front of the frame to the back. This measurement will determine the size of the brackets you need to install the blinds.
How do you install Day & Night Blinds?
Once you have your blinds and brackets, installing them is a straightforward process. Here are the steps you should follow:
Begin by measuring and marking the position of your brackets, using the depth measurement you took earlier. Make sure to position the brackets evenly on either side of the window.
Fix the brackets to the wall using the screws provided, ensuring that they are secure. Drill a single hole, insert the wall plug and screw the bracket into place, making sure the protruding tab of the bracket is closest the window. Repeat this for the other bracket.
Position the front edge of the bracket at least 70mm away from the window. You should also take into consideration any fixings on your windows such as handles that might obstruct the blind as it’s raised and lowered.
Insert the blinds into the brackets, making sure that they are level and secure.
Test the blinds to ensure that they are functioning correctly and adjust the layers as required.
If you need to take the blind down from the brackets once it has been installed, push the protruding tab on the bracket upwards which opens the bracket.