Dreaming of turning your garden shed from a junk-filled nightmare into an organized haven?
Garden shed renovations are the latest obsession among homeowners. As 60% of us opt for DIY solutions, everyone’s searching for practical ways to upgrade their outdoor spaces without the price tag.
Here’s the deal…
The typical homeowner views their shed as a place to stuff everything that doesn’t fit inside their house. Tools. Equipment. Broken furniture. Bags of fertilizer. Old paint cans. It all ends up in the shed.
The thing is, it doesn’t have to be this way. A smart renovation project can turn your garden shed into a highly functional area that’s even better than what you started with.
Here’s what you’ll discover:
- Planning the Renovation Project
- Choosing the Right Foundation
- Smart Storage Ideas
- Multi-Purpose Shed Solutions
- Smart Details That Matter
Planning the Renovation Project
The first rule of shed renovations?
Don’t dive in with a sledgehammer swinging.
The biggest mistake homeowners make is starting work without any idea of what they’re trying to achieve. They end up repainting the walls or building new shelves, but these changes don’t make the shed more usable.
Before you do anything else, sit down and figure out your purpose.
Do you just need a place to store your garden equipment? Do you also want a workspace in your shed? Are you looking to create a potting station or do you have some other goal in mind?
Decide what you want from the space. Then measure all your current equipment. The lengths and widths of your lawnmower, hedge trimmer, toolboxes, whatever you store.
You need to design your storage solutions around the dimensions of what you already own.
Choosing the Right Foundation
The foundation of a shed renovation project is literal.
If you’re building from scratch or gutting an existing structure, the foundation needs to be solid. Check that your shed isn’t sagging, tilting, or sinking.
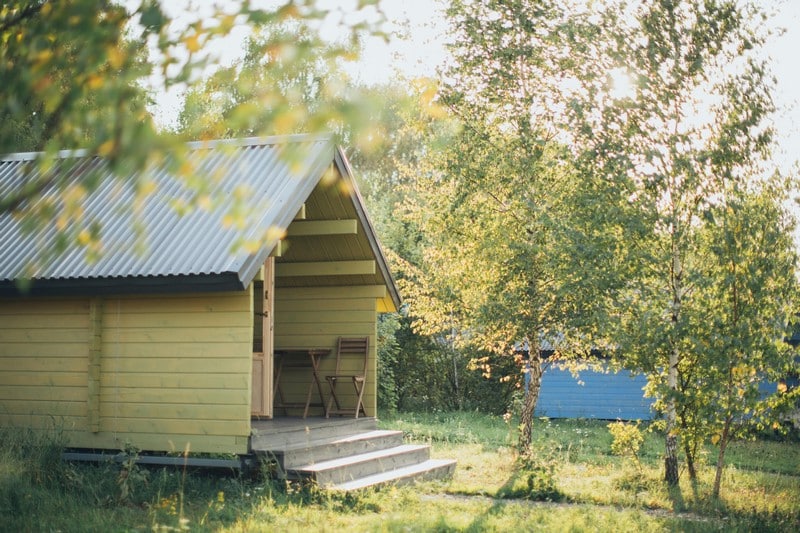
Ideally, you start with painted garden sheds that have an existing frame and basic design. The professional exterior finish protects the wood and means you don’t have to sand and prime everything.
But before you hang any shelves or install pegboards, check the foundation.
Foundation issues cascade and cause problems throughout the whole structure. Door jambs stop fitting properly. Shelves come out wonky. The whole thing feels unstable.
Fix any foundation issues before you do anything else.
Smart Storage Ideas
The secret to a highly functional shed renovation is smart storage.
Standard storage systems use up too much floor space. The average shed contains towering stacks of boxes and clutter everywhere.
Smart renovations use walls and vertical space. Vertical storage solutions:
- Pegboards for hanging tools
- Heavy-duty shelving units (install along at least 2 walls)
- Overhead storage racks
Hang pegboards low so you can easily access tools without reaching. Label hooks with the tools they hold, like this:
Install shelving on at least 2 walls. Use higher shelves for seasonal storage. Middle shelves for equipment and things you access frequently. Bottom shelves for heavy items like bags of fertilizer or paint.
Take advantage of overhead storage space. Install sturdy racks near the ceiling for storing holiday lights, camping gear, or boxes.
Modular Storage Systems
The holy grail of shed renovations is a modular storage system.
Modular storage lets you reconfigure your shelves and compartments as your needs change. You can add new drawers, switch out shelf positions, or build new compartments easily.
Look for modular storage systems with adjustable shelves, sliding bins, removable dividers, and stackable containers.
Multi-Purpose Shed Solutions
The best shed renovations have multiple zones for different activities.
Limiting your shed to storage or workspace means you’re not using the area to its full potential. Think about how you use the space. Maybe you need storage AND a workspace. Or storage AND a potting station.
Divide the shed into different zones. Dedicate one corner to gardening equipment, a second section for power tools, and a third area for a workbench.
Adding a Workspace
Good lighting is critical for a workspace.
Try to maximize natural light with skylights or window inserts if possible. For artificial lighting, mount bright LED strips directly over your workbench or areas where you need to see small parts.
A fold-down workbench uses a fraction of the space of a fixed table. When you’re done working, you can fold it up against the wall.
Make sure you have access to power outlets too. Get an electrician to install proper plugs so you can safely use power tools.
Creating a Potting Station
A potting station is a game-changer for gardeners.
Installing a dedicated area to work with soil and plants transforms the hobby.
Fit a waist-height counter along one wall for your soil, seeds, pots, and tools. Install shelves above the counter for extra storage.
A small sink makes life so much easier. If you can fit it, grab a plumbed-in sink so you can wash your hands without trudging back to the house.
Put seeds and other small tools in clear containers so you can easily see what’s inside. Label everything.
Smart Details That Matter
Details make shed renovations extra-functional.
Hang hooks everywhere. On the doors, on the walls. There’s never too many hooks in a garden shed.
Install a magnetic strip on one wall for metal tools. Trowels, scissors, pruners, they all stay organized and visible.
If you plan to use the shed year-round, consider climate control. A small space heater for winter and a simple fan for summer make the space comfortable.
Something most people forget…
Good ventilation is essential for preventing moisture buildup. Install vents near the roof peak to keep the air circulating.
Weather-Resistant Features
Last but not least, don’t forget weatherproofing.
Look for gaps around doors and windows and seal them with weatherstripping. Moisture, dust, and bugs can get into the smallest gaps.
If you’re repainting or staining, make sure you use exterior-grade paints and stains. It costs more, but they last for years.
Inspect the roof and seal any leaks. Water damage is the death of any outdoor structure.
DIY or Call in the Pros
Should you DIY your garden shed renovation?
In many cases, YES. Most aspects of these renovation projects are easily within the skills of a competent DIYer.
Painting walls or installing shelves are no-brainer DIY jobs. The average homeowner can do these things with just a weekend’s worth of time.
But if you’re tackling electrical work or structural repairs, it might be worth hiring a professional.
There’s nothing wrong with enlisting the help of a skilled contractor to do the technical stuff. Then do the rest yourself.
DIY is huge right now, and garden shed renovations are a great place to start. You can do these projects at your own pace and budget.
Wrapping This Up
Maximizing functionality in your garden shed renovation project is all about:
- Planning your purpose
- Checking your foundation
- Installing vertical storage to make the most of the space
- Dividing the shed into distinct zones or areas for different activities
- Adding good lighting, ventilation, and power access
- Using weatherproof materials where necessary
Your shed renovation is easier than you think. A few smart storage solutions and design touches can transform it.


