Smart insulation planning starts with simple steps like sealing air leaks, setting the right R-values, and picking materials that match the house. The goal is a tight, dry envelope that keeps conditioned air where it belongs. A good plan cuts drafts and noise. It also lowers bills without creating moisture problems. Use this guide as a checklist you can act on today.
1. Map your targets before buying materials
List problem rooms and surfaces. The attic, walls, floors over garages, and rim joists often show the biggest gaps. Note the climate zone and code targets and compare today’s R-values to what your home needs to perform well.
Use an R-value calculator to align cavity depth, product type, and your zone. It keeps choices grounded in numbers. Be sure to do a quick field test. You can use a phone IR add-on if you have one, or run a hand along surfaces to spot cold lines.
2. Seal air leaks first, then add insulation
Air leakage drives heat loss faster than conduction. You should first seal so the new insulation works as rated. Start at the top of the house. Caulk and foam around ceiling penetrations, bath fans, and top plates, and add gaskets to attic hatches.
In basements, seal the sill plate and rim joist. Be sure to use mastic on duct seams. A smoke pencil or incense stick will show hidden leaks on windy days. If you can, schedule a blower door test before and after the work. The test confirms progress and guides your next steps.
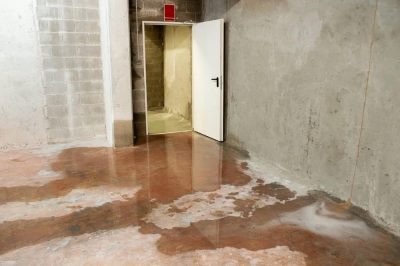
3. Match materials to location and moisture
Different areas need different tools. Blown cellulose or loose fiberglass is ideal for open attics, since it fills gaps well. Dense pack cellulose adds R-value and reduces air movement in closed walls. Spray foam shines at the rim joist and complex cavities.
In basements and crawl spaces, use rigid foam or closed-cell foam on concrete to control condensation. Place vapor control on the warm-in-winter side unless the local code says otherwise. Be sure to vent roof decks with proper baffles in cold regions. Use approved unvented assemblies where design calls for it. The goal is dry, continuous, and well-detailed layers.
4. Plan details that protect performance
Great installations rely on small choices. Add baffles at every soffit bay to keep vents open. Make sure to extend them a bit above the top plate to stop wind washing. Install depth rulers in attics so coverage stays uniform. Maintain clearances around flues and non-IC-rated lights. You should also cap and insulate the attic hatch like a mini door.
In knee walls, make sure to air seal sheathing on the back side, insulate, then add a smart membrane if required. Make sure to mark every fix with photos. Good documentation helps you verify and helps contractors bid accurately.
5. Budget, incentives, and phasing
Work in stages if needed. Start with the attic, then ducts, walls, or crawl spaces. These moves deliver fast comfort gains and visible savings. Price labor, materials, and any disposal costs.
Be sure to check utility rebates and federal credits. Many programs lower the net cost when you use the listed products and approved contractors. Get two or three bids with written scopes and R-values. Ask for blower door numbers and insulation depth targets. You should also plan seasonal timing. Attics are easier in cooler months, and crawl spaces are easier in dry spells.
Endnote
Smart insulation planning is simple. Measure where you are, seal the leaks, choose the right assemblies, and verify results. Keep notes, photos, and energy bills so progress stays clear. A calm, stepwise plan turns upgrades into a warmer, quieter, and cheaper home to run.