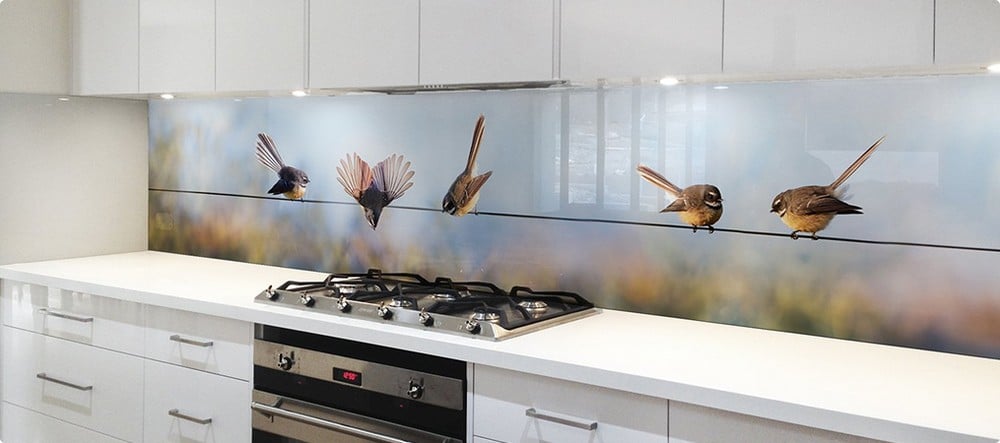
Kitchen glass splashbacks have become an essential feature in modern kitchen design, seamlessly blending functionality with aesthetic appeal. These sleek panels not only protect your walls from splashes and stains but also add a touch of elegance and sophistication to your cooking space. In this article, we explore the benefits, design options, installation process, and maintenance tips for kitchen glass splashbacks.
What Are Kitchen Glass Splashbacks?
Kitchen glass splashbacks are panels made from toughened (tempered) glass, typically installed behind countertops, stoves, or sinks. Their primary function is to shield walls from water, grease, and food splatters. Beyond their practicality, these splashbacks serve as a design statement, offering a sleek and contemporary touch to your kitchen décor. Thanks to advances in technology, they are available in a wide range of colors, textures, and custom prints that can match any kitchen style.
Benefits of Kitchen Glass Splashbacks
1. Protection and Durability
Glass splashbacks provide an effective barrier against everyday kitchen messes. Their non-porous surface prevents staining, mold, or bacterial growth. The tempered glass used in these splashbacks is extremely resistant to heat and impact, making it ideal for placement behind cooktops and sinks. Unlike other materials, glass doesn’t absorb liquids or grease, which helps it stay cleaner for longer and extends its lifespan.
2. Aesthetic Appeal
A glass splashback adds instant elegance to any kitchen. Its glossy, reflective surface enhances the light in the room, creating a brighter and more open feel. Whether you choose a bold color for contrast or a neutral shade for a harmonious look, a glass splashback helps define your kitchen’s personality. You can even customize it with prints, patterns, or photos for a one-of-a-kind design feature.
3. Easy Maintenance
Cleaning a glass splashback is simple. Unlike tiled walls, there are no grout lines to scrub or seal. A soft cloth and mild detergent are usually enough to keep it spotless. For tougher stains, a vinegar and water solution works effectively without damaging the surface. This ease of maintenance makes glass splashbacks a hygienic and time-saving choice for any kitchen.
4. Versatility in Design
Glass splashbacks come in various sizes, shapes, and finishes. You can choose from high-gloss, matte, frosted, or even textured surfaces. With such versatility, they can suit anything from a minimalist modern kitchen to a colorful eclectic space. Additionally, digital printing allows for completely custom designs—city skylines, floral motifs, or even inspirational quotes.
Design Options for Kitchen Glass Splashbacks
Color and Pattern Choices
Today’s splashbacks come in a huge array of colors and patterns. You can opt for bright colors to make a statement or soft, subtle tones for a seamless effect. Some homeowners choose marble or stone-look prints to create a luxurious effect without the high cost. Others go for vivid geometric patterns or abstract art to add a bold focal point.
Integration with Other Kitchen Materials
Glass splashbacks pair beautifully with a wide variety of kitchen materials. Whether you have stainless steel appliances, timber cabinets, or quartz countertops, a glass splashback blends in while adding contrast or shine. Their reflective nature also enhances natural light, making them ideal for small or darker kitchens.
Innovative Layouts
Beyond single large panels, you can experiment with layouts that include multiple pieces, layered designs, or asymmetrical configurations. For example, use a full-height glass splashback behind the stove and smaller side panels elsewhere for a more dynamic look. Mixing finishes—such as combining matte and gloss sections—can also create subtle visual interest.
Installation and Maintenance Tips
Professional Installation
While DIY installation is technically possible, professional installation is strongly recommended. Experts will take precise measurements, cut around sockets and corners, and apply the correct adhesive and sealants. A clean and exact installation not only looks better but also ensures the splashback is safe and secure.
Preparing the Surface
Before installing a splashback, the wall must be dry, clean, and level. Any uneven surfaces should be sanded or repaired to ensure the glass lays flat and adheres properly. Poor preparation can lead to gaps, uneven adhesion, or stress on the glass that may cause cracks over time.
Regular Cleaning
To keep your splashback looking new, wipe it down regularly with a soft cloth. Avoid abrasive pads or harsh chemical cleaners, as they may scratch the glass. For grease or stubborn stains, use a solution of water and white vinegar. Dry the surface with a microfiber cloth to avoid streaks and enhance shine.
Safety Considerations
Always ensure your splashback is made from tempered safety glass. This material is designed to break into small, blunt pieces in the unlikely event of shattering, making it far safer than standard glass. This is particularly important in high-traffic family kitchens where accidents can happen.
Conclusion
Kitchen glass splashbacks offer the perfect combination of style, durability, and convenience. They protect your walls, brighten your space, and provide a modern design element that can be tailored to your unique taste. Whether you’re renovating your kitchen or designing one from scratch, glass splashbacks are a smart and stylish investment.
By choosing high-quality materials and professional installation, you’ll enjoy a surface that looks stunning, cleans easily, and lasts for years. Bring elegance, ease, and a touch of luxury to your cooking space with a kitchen glass splashback that does it all.


